
How to handle bleed in comics is something that a lot of artists have problems with, so here’s everything you need to know about it (and if it’s not, let us know so we can explain it better).
Bleed is applied when you have an image that spreads out to the end of the page.
1. This is what you want the page to look like:

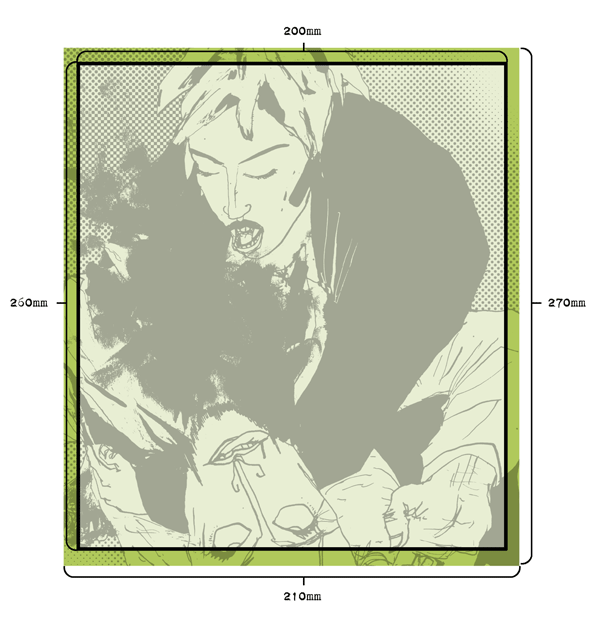
2. Because of printing technicalities*, you need to add bleed to the page. Usually 5mm.
3. This means that the document should be bigger than the actual page will be in the finished printed book. Here are the measurements for an issue of CBA**. Please note that it’s 5mm bleed in each direction, so the document will be 10mm bigger than the actual page (in this case, 5+200+5=210mm width and 5+260+5=270mm height).

4. So the image should extend outside of the printed page, like this, even if the part in the bleed (the green part) won’t end up on paper.
5. It’s also a good idea not to have any important details or text too close to the edge of the page, so you should keep a margin of 3-5mm as well, just to be safe.

* When things are printed, sometimes the paper moves a little inside the printing press, so things don’t always end up exactly where you want them. To counteract this, you need to add bleed. They may ask you for more or less sometimes, but 5mm works for most printers.
** Yes, you are correct. This example doesn’t match those proportions. But never mind that, this is just an example.
6. And here are a few (slightly exaggerated) examples of what it can look like when you do it wrong.


Hope this will help you. Enjoy!
BONUS FEATURE
Here’s the template/instructions for a CBA cover:
